Contents
I have created the posts below as part of a series, getting started with Linux/Kubernetes/Docker/Golang/AKS/Minikube.
- PART 10 - Monitoring a Containerized Go app in AKS using Azure Monitor for Containers
- PART 9 - Deploying Containerized Go app to Azure Container Instances
- PART 8 - Deploying Containerized Go app to Azure Dev Spaces
- PART 7 - Deploying Containerized Go app via Skaffold
- PART 6 - Deploying Containerized Go app to Azure Kubernetes Service (AKS)
- PART 5 - Configuring Azure Container Registry (ACR)
- PART 4 - Deploying Containerized Go app to Minikube
- PART 3 - Containerizing a Go app
- PART 2 - Getting started with Go
-
PART 1 - Running Minikube
- Goodbye Windows, Hello Ubuntu
Start from the bottom up if you’re new here :-)
Monitoring a Containerized Go app in AKS using Azure Monitor for Containers
April 2019
In Part 6 we deployed the Go book application into AKS. This deploys fine and will then run quite happily until you delete it, or experiences issues. Ideally you do not want to wait for your application to die due to performance or other health issues, you should be proactive in its monitoring. This is where Azure Monitor for Containers comes into play.
In order to enable Azure Monitor for Containers there is a great article to follow on Azure Docs (https://docs.microsoft.com/en-us/azure/azure-monitor/insights/container-insights-onboard). There are important pre-requisites to check and these are highlighted here but in the simplest of terms the following Azure CLI command will enable for your cluster:
az aks enable-addons -a monitoring -n MyAKSCluster -g test-group
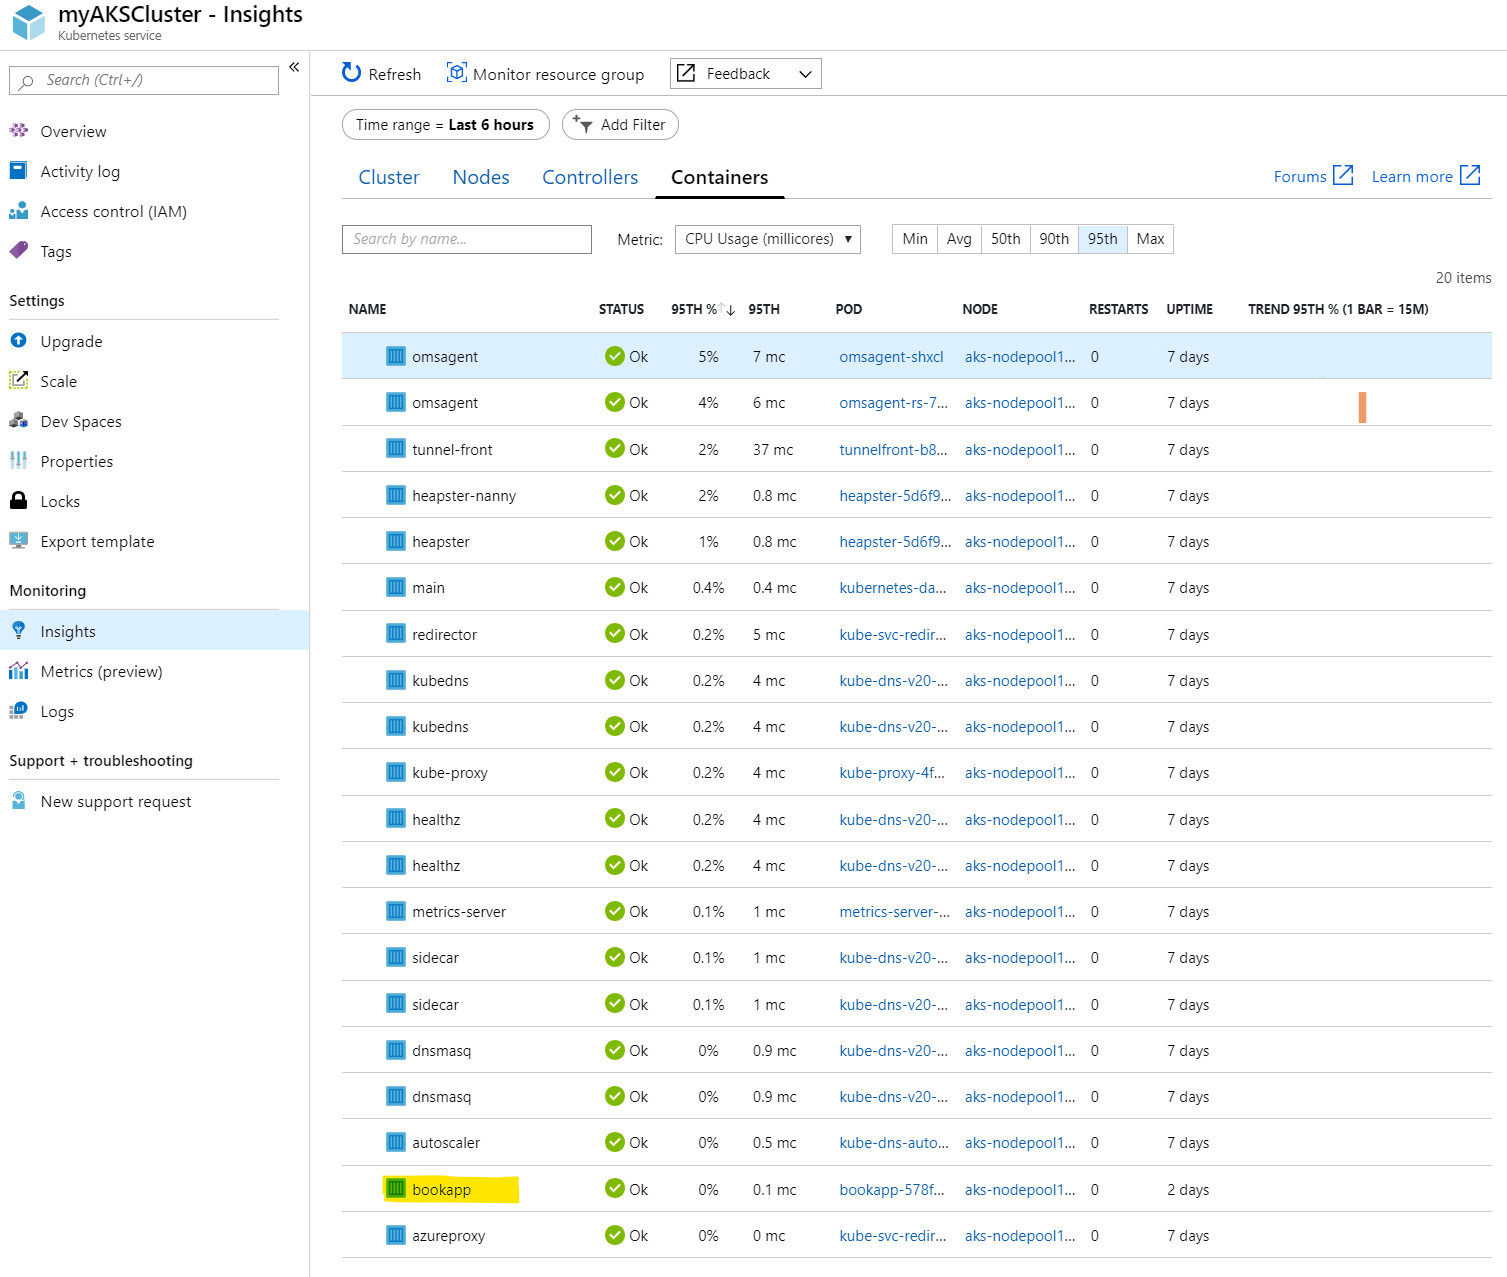
Once enabled, you can click on the Insights link under the Monitor tab in the AKS blade and you will see you have the option to view Health for the Cluster, Nodes, Controllers and Containers.
Selecting the Containers tab will display a list of all containers in the AKS cluster along with various information on their health. In the image below we can see our Go book application (bookapp) highlighted.
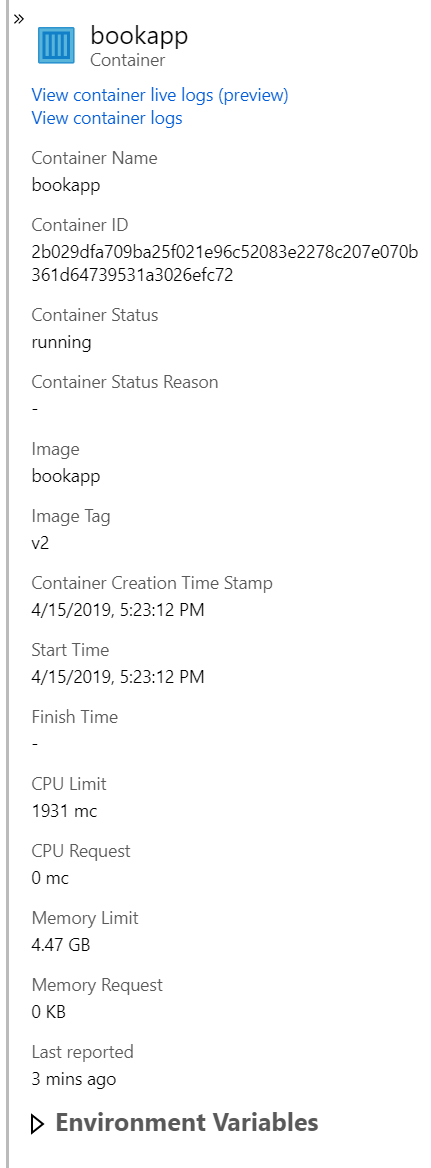
Clicking on the bookapp Container will open another blade to the right and show you more detail on the specific container.
In the next part of my blog we will go through viewing Container Logs and Container Live Logs!
Deploying a Containerized Go app to Azure Container Instances
June 2018
Just as you thought we couldn’t deploy our little Go book application anywhere else, we shouldn’t forget about Azure Container Instances (ACI). ACI is a fantastic place to spin up dev/test containers as they’re single instance and as near to immediate to deploy as you can get with a cloud hosted container service. There are several command line options available to tweak your container instance, from CPU to memory to the OS type (Windows or Linux) but in order to host our Go application we will just accept the defaults. We will be deploying from the Azure Container Registry we created here so we need to once again get the admin password for it to give to ACI.
Get ACR Credentials
$ az acr credential show --name mytestacr001 --resource-group test-group --query "passwords[0:1].value"
Deploy Go application to ACI
$ az container create --resource-group test-group --name bookappcontainer --image mytestacr001.azurecr.io/bookapp:v1 --dns-name-label bookapp --ports 8000 --registry-username mytestacr001 --registry-password <xxxxxxxxxxxxxxxxxxxxxxxxxxxxxxxxxxxxx>
Replace the
Retrieve the ACI container URL
$ az container show --resource-group test-group --name bookappcontainer --query "ipAddress.fqdn"
Browse the ACI URL
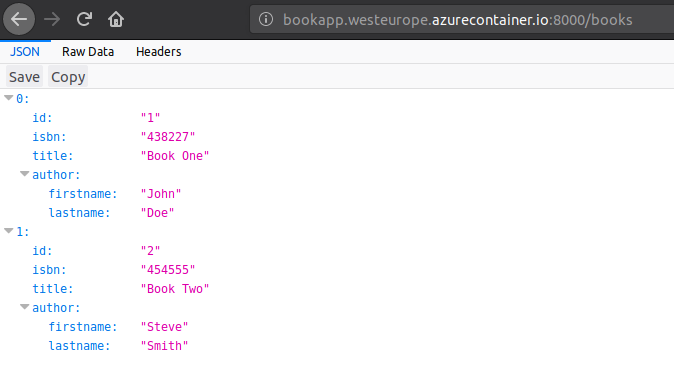
Such a great way to test a container if you don’t have access to Minikube or AKS or any other Kubernetes service - and with the benefit of hosting it in the public cloud with a publicly visible URL!
There is always another way!
Just to make things complete, there is another way to deploy ACI containers - we can use a YAML files (or ARM Template). We can deploy a single instance ACI Container Group. Create a file called deploy-bookapp.yaml and paste the following content in:
apiVersion: 2018-06-01
location: eastus
name: bookContainerGroup
properties:
  containers:
  - name: bookcontainer
    properties:
      image: mytestacr001.azurecr.io/bookapp:v1
      resources:
        requests:
          cpu: 1
          memoryInGb: 1.5
      ports:
      - port: 8000
  osType: Linux
  ipAddress:
    type: Public
    ports:
    - protocol: tcp
      port: '8000'
  imageRegistryCredentials:
  - server: mytestacr001.azurecr.io
    username: mytestacr001
    password: <INSERT REGISTRY PASSWORD>
tags: null
type: Microsoft.ContainerInstance/containerGroups
You will need to change the name of the ACR for the image:, server: and username: as well as pasting in the password: for your ACR, retrieved as per usual with $ az acr credential show --name mytestacr001 --resource-group test-group --query "passwords[0:1].value".
Save this file and then run the following command to deploy our Go application.
$ az container create --resource-group test-group --name bookContainerGroup -f ~/deploy-bookapp.yaml
This will create our new ACI container group, containing a single container running out Go application.
Make sure the name used on the create command matches that in the YAML file in the
namesection
You can check on the status of the deployment using:
$ az container show --resource-group test-group --name myContainerGroup
To get the IP address of the container you can run:
$ az container show --resource-group test-group --name myContainerGroup --query "ipAddress.ip"
Paste this into a browser and append :8000/books and you will see our Go application happily running!
Deploying a Containerized Go app to Azure Dev Spaces
June 2018
Azure Dev Spaces (AZDS) is a Preview feature in Azure, working in a similar fashion to Skaffold. It will automatically determine the language your application is written in (dotnetcore and nodejs right now) and generate the required YAML files and Dockerfile in order to deploy to Azure Container Service (AKS).
There is a great post on how to get started with Azure Dev Spaces right here. I recommend you follow this post before carrying on here as it details everything you need to know to install AZDS. In a nutshell though, it’s the following command:
az aks use-dev-spaces -g test-group -n MyAKSCluster
You must make sure that the AKS cluster you are deploying to has been built with HTTP Application Routing enabled. I have yet to see a way to enable this POST AKS cluster creation.
What I will show you in this post is how to “work around” the limitation of AZDS not supporting Go, so we can deploy our app (again!)
First off we need to create a new directory to store our AZDS project in and copy some files in from our ~/go_restapi directory.
$ mkdir ~/bookapp
$ cp ~/go_restapi/main.go .
$ cp ~/go_restapi/Dockerfile .
Now we need to edit main.go and change the http listener port to 80 instead of 8000. I have tried deploying to AZDS with port 8000 but it fails. It could just be a limitation of the Preview or I could be doing something wrong! This way works though.
We also need to edit Dockerfile and add the following lines after the first line of the file, the FROM line.
EXPOSE 80
ENV PORT 80
Once you have made these changes you can run the following to prepare the directory for use with AZDS:
$ cd ~/bookapp
$ azds prep
This will create the Helm charts and the azds.yaml file we need.
That’s it. Now run:
$ azds up
This will build our container and deploy it to AKS - exposing it to our local machine through the Kubernetes proxy so we see it as http://localhost:xxxxx - with a random port generated.
The output from azds up should be similar to:
Using AKS cluster: 'myAKSCluster'
Synchronizing files...1s
Installing chart...4s
Building container image...
Step 1/9 : FROM golang:latest
Step 2/9 : EXPOSE 80
Step 3/9 : ENV PORT 80
Step 4/9 : RUN mkdir /app
Step 5/9 : ADD . /app/
Step 6/9 : WORKDIR /app
Step 7/9 : RUN go get github.com/gorilla/mux
Step 8/9 : RUN go build -o main .
Step 9/9 : CMD /app/main
Built container image in 9s
Waiting for container...1s
Press Ctrl+C to detach
Service 'bookapp' port 'http' is available at http://localhost:33957
You can now visit http://localhost:33957 and append /books to see our Go app once more deployed into Kubernetes!
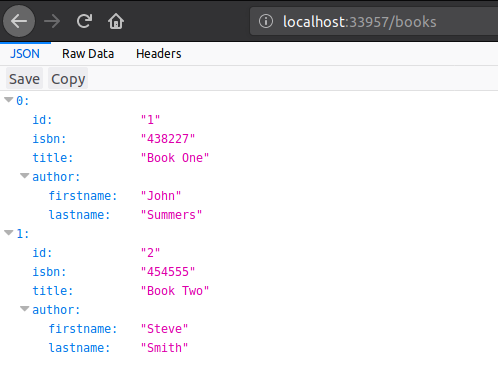
If you go back to your terminal window you should see that the HTTP logging appears from you hitting the website in the browser:
localhost --ngu-> bookapp-d4db7798-8j6wd:
   GET / HTTP/1.1
localhost <-ngu-- bookapp-d4db7798-8j6wd:
   HTTP/1.1 404 Not Found
   404 page not found
localhost --fhn-> bookapp-d4db7798-8j6wd:
   GET /books HTTP/1.1
localhost <-fhn-- bookapp-d4db7798-8j6wd:
   HTTP/1.1 200 OK
   [{"id":"1","isbn":"438227","title":"Book One","author":{"firstname":"John","lastname":"Doe"}},{"id":"2","isbn":"454555","tit...<[TRUNCATED]>
When you are finished with your container you simply hit CTRL-C and then run:
$ azds down
This will remove the deployment from Kubernetes.
Deploying Containerized Go app via Skaffold
June 2018
You probably wont see the point of Skaffold, until you use it! It is a simple command line tool that help to facilitate Continuous Deployment into Kubernetes. You are still required to create your Kubernetes deployment YAML files but Skaffold can take your application from GitHub (or local Git repository), build it into a Docker Container, deploy it to a registry and then kick off a Kubernetes deployment/service build. In Development mode it will then watch for any code changes to your Git respository and upon finding any, rebuild your Docker container and re-deploy to Kubernetes in a matter of seconds.
Lets take our Go books application and deploy it to Minikube using Skaffold. Everything here is local to the PC. Skaffold does have a requirement of a Git repository.
In one of the previous posts we cloned a repository from Brad Traversy to get our sample Go application. This has the benefit of having a .git directory already in place.
Create Kubernetes deployment YAML
Our Kubernetes YAML file is very similar to the one we used to deploy to AKS, however it does not need the imagePullSecrets entry and the name of our image needs to change as we cannot use the :v1 suffix with Skaffold images.
cd ~/go_restapi
$ nano ./k8s-deploy.yaml
Copy and Paste the following into the new file:
apiVersion: apps/v1beta1
kind: Deployment
metadata:
  name: bookapp
spec:
  replicas: 1
  template:
    metadata:
      labels:
        app: bookapp
    spec:
      containers:
      - name: bookapp
        image: bookapp
        ports:
        - containerPort: 8000
---
apiVersion: v1
kind: Service
metadata:
  name: bookappsvc
spec:
  type: LoadBalancer
  ports:
  - port: 8000
  selector:
    app: bookapp
As you can see, it’s 98% similar. Next we need to create our skaffold.yaml file in the current directory:
$ nano ./skaffold.yaml
Copy and Paste the following into the new file:
apiVersion: skaffold/v1alpha2
kind: Config
build:
  artifacts:
  - imageName: bookapp
deploy:
  kubectl:
    manifests:
      - k8s-*
This tells Skaffold to create and use a Docker Image called bookapp and to use any YAML files in the current directory that start with k8s- for our Kubernetes deployment. For our sample we are just using a single YAML file.
Our ~/go_restapi directory should now have the following files:
Dockerfile
k8s-deploy.yaml
main.go
README.md
skaffold.yaml
Plus the hidden .git directory.
Set Docker to Minikube context
We need to run this before we use Skaffold with Minikube, as with previous posts. This will tell Minikube to use the local Minikube docker repository.
$ eval $(minikube docker-env)
Run Skaffold
$ skaffold dev
This will start the process of building and deploying your Container image to Minikube and you should see something similar to the following output:
Starting build...
Found [minikube] context, using local docker daemon.
Sending build context to Docker daemon  54.78kB
Step 1/7 : FROM golang:latest as build
 ---> 6b369f7eed80
Step 2/7 : RUN mkdir /app
 ---> Using cache
 ---> 5f7fd48e7f4a
Step 3/7 : ADD . /app/
 ---> c17de8bf4476
Step 4/7 : WORKDIR /app
 ---> 4c213022c368
Step 5/7 : RUN go get github.com/gorilla/mux
 ---> Running in 274ffe968e2e
 ---> 62f709afcfbf
Step 6/7 : RUN go build -o main .
 ---> Running in a6e0b0b98234
 ---> 60f8ff070afb
Step 7/7 : CMD ["/app/main"]
 ---> Running in c731ddb7c1a4
 ---> 351a772bfb55
Successfully built 351a772bfb55
Successfully tagged 40a56d52b789bdadd1e5325a44499012:latest
Successfully tagged bookapp:326a73e-dirty-1fae2ea9f96f7b0f
Build complete in 4.862327709s
Starting deploy...
deployment.apps "bookapp" created
service "bookappsvc" created
Deploy complete in 249.136025ms
Watching for changes...
Notice the last line Watching for changes… - this is where the Continuous Delivery part comes in shortly.
Test Minikube deployment
$ minikube service buildappsvc
You should see in your browser something similar to the screenshot below, don’t forget to append /books to the URL.
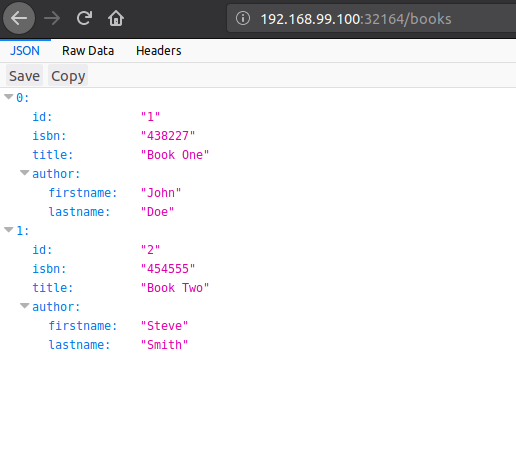
Go ahead and make a change to the main.go file, change the name of an Author for example. As soon as you save the file Skaffold will pick up the change, rebuild the Docker container and re-deploy it to Minikube. Pretty cool!
Refresh your browser and look for the change. In my case I changed the Surname of the first Author from Doe to Summers.
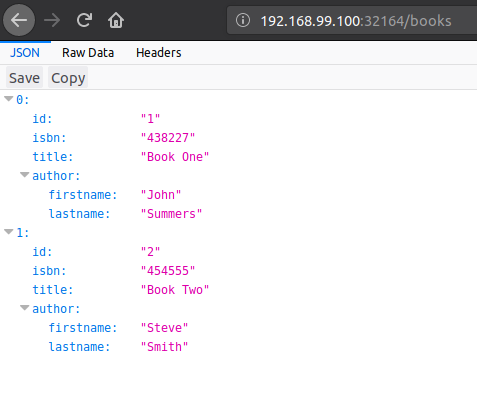
Once you are done with testing, hit CTRL-C in the terminal window and this will stop the Skaffold process and clean up Minikube by deleting the bookapp service and deployment.
^CCleaning up...
deployment.apps "bookapp" deleted
service "bookappsvc" deleted
Cleanup complete in 1.688479196s
Deploying Containerized Go app to Azure Kubernetes Service (AKS)
June 2018
Deploying the Go book app to AKS will conclude the journey from it running on a local PC, to running in a Docker container, to running in a local Minikube cluster to running in Azure AKS! This part of the series takes the longest to setup due to the deployment of the Kubernetes cluster (AKS) in Azure.
Register AKS Resource Provider
$ az provider register -n Microsoft.ContainerService
This will register the ARM Provider for AKS, if not already registered in your subscription.
Create a single node AKS Cluster
$ az aks create --resource-group test-group --name myAKSCluster --node-count 1 --generate-ssh-keys
This command will create the new AKS cluster in Azure with a single node, generating the SSH keys required to connect at a later stage via SSH, merging them into any existing keys. This command can take up to 30mins to run, be patient!
Get access credentials
$ az aks get-credentials --resource-group test-group --name myAKSCluster
This will merge the new cluster’s context into the local .kube/config file, allowing us to run kubectl commands against it.
Query the AKS Cluster nodes
$ kubectl get nodes
Once the cluster is created, we can see our single node.
Create Kubernetes Secret
First we need to get the primary password for our Azure Container Registry. We can do this via the Portal by navigating to the Access Keys section of ACR or we can do it with the Azure CLI.
Get ACR password
Either using the Azure CLI:
$ az acr credential show --name mytestacr001 --resource-group test-group --query "passwords[0:1].value"
Or from the Azure Portal:
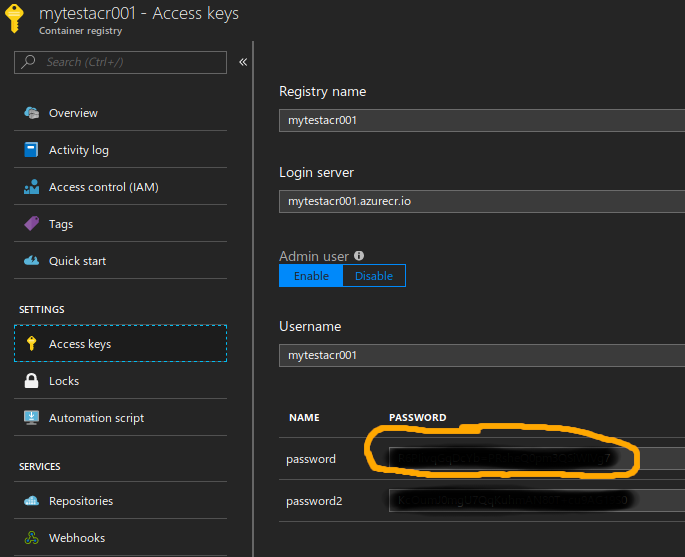
Create Kubernetes Secret
We need to store our Docker / ACR Credentials in an encrypted key within Kubernetes. This allows Kubernetes to access our Azure Container Registry and pull the image. This step is not required for a typical Production deployment as an Azure Service Principal would normally be used as previously mentioned.
$ kubectl create secret docker-registry mytestacrsecret --docker-server=mytestacr001.azurecr.io --docker-username=mytestacr001 --docker-password=xxxxxxxxxxxxxxxxxxxxxxxxxxx --docker-email=me@myemail.com
Replace the xxxxxxxxxxxxxxxxxxxxxxxxxx with the password retrieved from az or the Portal as well as using your real email address.
We are almost good to go with a deployment now. Final step is to create a deployment YAML file (call it bookapp.yaml) containing the information Kubernetes needs to deploy our application. We will just deploy a single replica for this demonstration, creating a new Kubernetes Service, exposing port 8000 through an external Load Balancer. This will make it visible on the internet.
Create the Kubernetes deployment YAML file
apiVersion: apps/v1beta1
kind: Deployment
metadata:
  name: bookapp
spec:
  replicas: 1
  template:
    metadata:
      labels:
        app: bookapp
    spec:
      containers:
      - name: bookapp
        image: mytestacr001.azurecr.io/bookapp:v1
        ports:
        - containerPort: 8000
      imagePullSecrets:
      - name: mytestacrsecret
---
apiVersion: v1
kind: Service
metadata:
  name: bookappsvc
spec:
  type: LoadBalancer
  ports:
  - port: 8000
  selector:
    app: bookapp
Deploy the Go book application to AKS
$ kubectl create -f ./bookapp.yaml
You can check on the status of your deployment by running:
$ kubectl describe service bookappsvc
Once you see something similar to the output below, you’re good to test in your browser.
Name:                     bookappsvc
Namespace:                default
Labels:                   <none>
Annotations:              <none>
Selector:                 app=bookapp
Type:                     LoadBalancer
IP:                       10.0.90.131
LoadBalancer Ingress:     40.114.xx.xxx
Port:                     <unset>  8000/TCP
TargetPort:               8000/TCP
NodePort:                 <unset>  30380/TCP
Endpoints:                10.244.0.9:8000
Session Affinity:         None
External Traffic Policy:  Cluster
Events:
  Type    Reason                Age   From                Message
  ----    ------                ----  ----                -------
  Normal  EnsuringLoadBalancer  3m    service-controller  Ensuring load balancer
  Normal  EnsuredLoadBalancer   18s   service-controller  Ensured load balancer
Browse to the LoadBalancer Ingress IP shown in the output above, appending port 8000/books and you should see our Go application once more, running inside of AKS.
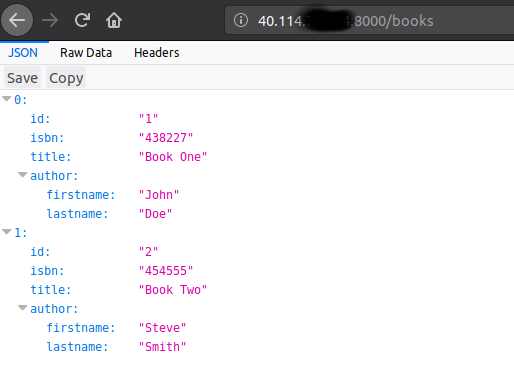
Configuring Azure Container Registry (ACR)
June 2018
In my next post we will look to deploy the Containerized Go app into Azure Kubernetes Service (AKS). Before we can do that we need to create an Azure Container Registry to store our Docker image of the Book API application.
Login to the Azure CLI
$ az login
Once logged into Azure we then need to list our subscriptions and pick the one we want to deploy our ACR resource into:
$ az account list
$ az account set --subscription <subscription ID>
Replace the <subscription ID> with the id field from your chosen subscription. Next we need to create a Resource Group to hold our Azure Container Registry.
Create a Resource Group
$ az group create --name test-group --location eastus
I have chosen East US as my region as I will be deploying AKS into the same region. At the time of writing only 5 regions support AKS. You van view the list here
Now let’s create the ACR resource itself. The ACR name needs to be globally unique as it is assigned to an FQDN.
Create Azure Container Registry
$ az acr create --name mytestacr001 --resource-group test-group --sku Basic --admin-enabled true
I am using the Basic SKU as this is just for dev/test and have enabled the --admin-enabled flag so that we don’t have to bother with creating Service Principals - if this was for a Production deployment then we should leave this to false. I will cover Service Principals for AKS another time.
You should see output similar to the following:
{
    "adminUserEnabled": true,
    "creationDate": "2018-06-06T01:44:27.008413+00:00",
    "id": "/subscriptions/00000000-0000-0000-0000-000000000000/resourceGroups/test-group/providers/Microsoft.ContainerRegistry/registries/mytestacr001",
    "location": "eastus",
    "loginServer": "mytestacr001.azurecr.io",
    "name": "mytestacr001",
    "provisioningState": "Succeeded",
    "resourceGroup": "test-group",
    "sku": {
      "name": "Basic",
      "tier": "Basic"
    },
    "status": null,
    "storageAccount": null,
    "tags": {},
    "type": "Microsoft.ContainerRegistry/registries"
  }
Now we need to login to our Azure Container Registry. This is equivalent to logging into Docker Hub and allows us to push our image up to ACR with regular Docker commands.
Login to Azure Container Registry
$ az acr login --name mytestacr001 --resource-group test-group
At the moment our bookapp:v1 Docker image is tagged as just a local Docker image, there is no prefix. In order to deploy our image into ACR we need to tag it with our new ACR login server name as a prefix.
Tag our Docker Image
$ docker tag bookapp:v1 mytestacr001.azurecr.io/bookapp:v1
With that done we can now push our image up to our new Azure Container Registry.
Push Docker Image to ACR
$ docker push mytestacr001.azurecr.io/bookapp:v1
After a few minutes you should see that the container image has been successfully stored in our new registry.
The push refers to repository [mytestacr001.azurecr.io/bookapp]
566ebac6410e: Pushed
da4eb6a08c72: Pushed
33e3f07c7ac8: Pushed
933b65eebe7d: Pushed
5ea538dd9f75: Pushed
6fa15c0fadea: Pushed
db38deaf0d0c: Pushed
fbbeadfbd3ca: Pushed
0f6f641d80ca: Pushed
76a66da94657: Pushed
0f3a12fef684: Pushed
v1: digest: sha256:dfd4cb81c5e09166904b1bade3a08524cbfab444ce136769bfdb20152923a35a size: 2633
Deploying Containerized Go app to Minikube
June 2018
In my last post I containerized a Go application using Docker. Now we’re going to deploy this container into our local Minikube environment. You will see how easy this is an why so many people use Minikube for their local Kubernetes testing.
First, make sure Minikube is running and is pointing at the local Minikube cluster. The output should point to minikube-vm
Get Minikube status
$ minikube status
Desploy container to Minikube
$ kubectl run bookapp --image=bookapp:v1 --port=8000
$ kubectl expose deployment bookapp --type=LoadBalancer
These two commands will deploy the bookapp container to Minikube and then expose the deployment to the local machine - see my previous post for more detail. If the first command fails with an error finding the Docker image, it is likely you did not run the eval $(minikube docker-env) command before creating it. You will need to re-create the Docker image after running this command.
To bring the website up in the local browser, simply run:
$ minikube service bookapp
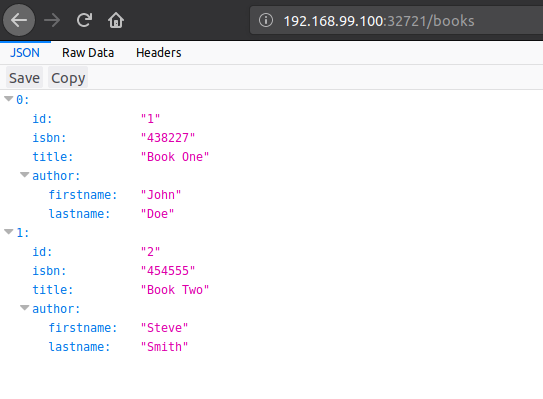
You will know see something similar to the image below. Notice how the URL is different to the Docker based URL, with a Kubernetes/Minikube exposed IP address and port.
Containerizing a Go Application
June 2018
What I thought I would do in this post is to show you how to run a cool little Go application that acts as simple RESTful API service for a Book application. This application was written by Brad Traversy and is demonstrated/explained in his YouTube video and demonstrates the Gorilla MUX router.
First off, we need to download a copy of the application.
Clone GitHub Repository
$ cd ~
$ git clone https://github.com/bradtraversy/go_restapi
You can run and test this locally.
Run the Go application
$ cd ~/go_restapi
$ go get github.com/gorilla/mux
$ go run main.go
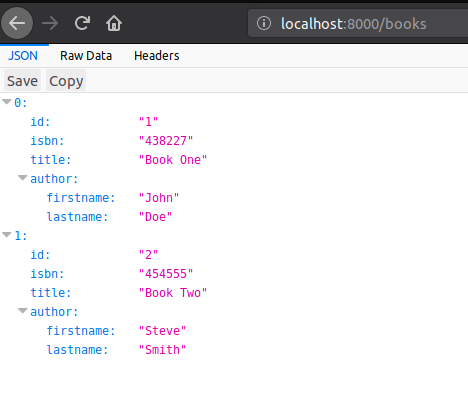
This will install the Gorilla Mux router and start a web server, listening on port 8000. If you browse to http://localhost:8000/books you should see the 2 sample books being served as JSON. Press CTRL-C to stop the application before continuing.
In order to run this application in Docker, we need to create a Docker file in the same directory with the following contents:
FROM golang:latest
RUN mkdir /app
ADD . /app/
WORKDIR /app
RUN go get github.com/gorilla/mux
RUN go build -o main .
CMD ["/app/main"]
This will use the golang:latest container image from DockerHub and copy our sample Book API application into the app directory. It will also install the Gorilla Mux router and build the application ready for running on container start.
Now we can build out new container with Docker and give it a test locally! This is where we need to choose our Docker environment first. If you plan on following my next post where we deploy this container to Minikube, you need to run the step below. If not, skip this step and proceed to the Docker Build command.
$ eval $(minikube docker-env)
Running this command will expose the container to the Minikube local Docker registry.
Build the Docker Image
$ docker build -t bookapp:v1 -f Dockerfile .
Run the Docker Image
$ docker run -p 8000:8000 bookapp:v1
This will expose port 8000 to our local machine so you can then test the application by browsing to http://localhost:8000/books as before, only this time the page will be served from our new container!
Getting started with Go
May 2018
So far in a previous post I have setup my new PC with Ubuntu, installed all the tools I need to work with Azure, Docker and Kubernetes. Now lets look at getting Go installed so we can start to develop some applications of our own to deploy into Docker, Minikube or AKS!
Install Golang
First of we need to download and configure Go to work in Ubuntu.
$ curl -O https://dl.google.com/go/go1.10.2.linux-amd.tar.gz
This will download Go for us and it’s pretty simple to install - so long as we configure our path variables everything should work first time around.
Extract the archive
$ sudo tar -xvf ./go1.10.2.linux-amd64.tar.gz
$ sudo mv ./go /usr/local
The above will extract the Golang folder structure and then move the entire top level folder to /usr/local where we will then reference it by updating our PATH environment variable.
$ sudo nano ~/.profile
Add the following to the end of the file:
$ export PATH=$PATH:/usr/local/go/bin
$ export GOPATH=$HOME/work
This assumes you would like a working directory for your Go applications to be in the work folder in your home directory. Save this file and run the following to reload:
$ source ~/.profile
Next week need to create some working folders:
$ mkdir $HOME/work
$ mkdir -p $HOME/work/src/github.com/<your github username>
Obviously replacing <your github username> with your real GitHub username. This makes working with Import statements easier later.
That should be it ! We can now test Go works but creating a Hello World application and running that. Copy the following code into $HOME/work/src/github.com/
package main

import "fmt"

func main() {
    fmt.Printf("hello, world\n")
}
Save this file to disk.
Run the Go application
$ cd $HOME/work/src/github.com/<your github username>/hello
$ go run ./hello.go
You should see the hello, world output.

Next post I will look at Containerizing a Go application.
Running Minikube
May 2018
My last post described how I setup my new Ubuntu desktop PC with all the tools I need to do my job. Now I will look at how we test Minikube is working by deloying a sample application
Now we have Minikube working we can deploy a sample application to test it. First we need to make sure Minikube is running.
Get Minikube Status
$ minikube status
Assuming we get something like the below, we’re good to go:
minikube: Running
cluster: Running
kubectl: Correctly Configured: pointing to minikube-vm at 192.168.99.100
First let’s start the deployment (this is taken from the Kubernetes site for reference).
Deploy sample application to Minikube
$ kubectl run hello-minikube --image=k8s.gcr.io/echoserver:1.10 --port=8080
This will download the sample echoserver node.js application and start a new Kubernetes deployment. You can see the deployment running by entering:
$ kubectl get deployment
Then we need to expose port 8080 to our host system so we can see the website running. With Minikube this is super easy, completed with just one command:
$ kubectl expose deployment hello-minikube --type=NodePort
This will automatically create a Kubernetes service and expose the port. Running kubectl get services will show you something similar to the below:
$ hello-minikube NodePort 10.100.74.0 <none> 8080:32732/TCP 16s
Note the hello-minikube service. Running the following will query the new service and show the output from the application:
$ curl $(minikube service hello-minikube --url)
The result should look something similar to:
Hostname: hello-minikube-7c77b68cff-dn7pf

Pod Information:
        -no pod information available-

Server values:
        server_version=nginx: 1.13.3 - lua: 10008

Request Information:
        client_address=172.17.0.1
        method=GET
        real path=/
        query=
        request_version=1.1
        request_scheme=http
        request_uri=http://192.168.99.100:8080/

Request Headers:
        accept=*/*
        host=192.168.99.100:32732
        user-agent=curl/7.58.0

Request Body:
        -no body in request-
We can now delete the service and deployment to clean up Minikube.
$ kubectl delete services hello-minikube
$ kubectl delete deployment hello-minikube
Goodbye Windows, Hello Ubuntu
May 2018
I decided a few weeks ago that it was time to ditch Windows as my operating system of choice. I might work for Microsoft but the good thing about the new Microsoft is that we are all for personal choice. Don’t get me wrong, I will still be using Microsoft technology but now it will be more Cloud focussed, specifically Microsoft365 or Azure.
My day to day job doesn’t rely on anything that I can’t run outside of Windows, with one exception… Skype for Business. Until that changes, my laptop will remain a Windows based operating system. For now :-)
Working with Microsoft Azure means I get to spend a lot of time interfacing with it either via a CLI or programatically via REST APIs, ARM Templates or Go/C#/Python. I’m going to go through the steps I did to configure my fresh Ubuntu 18.04 installation.

Install Azure CLI
Obviously, my main tool of choice get’s installed first!
First off we need to add the Azure CLI Repo to our list of sources
$ AZ_REPO=$(lsb_release -cs)
$ echo "deb [arch=amd64] https://packages.microsoft.com/repos/azure-cli/ $AZ_REPO main" | sudo tee /etc/apt/sources.list.d/azure-cli.list

$ curl -L https://packages.microsoft.com/keys/microsoft.asc | sudo apt-key add -
Next we need to install the apt-transport-https package as a prerequisite - then we can install the Azure CLI
$ sudo apt-get install apt-transport-https
$ sudo apt-get update && sudo apt-get install azure-cli
That’s it. Simples. To make sure it works, just login.
$ az login
Whilst we’re doing the Azure CLI we might as well install the Kubernetes CLI, kubectl. This allows us to manage a local (minikube) or remote (AKS) Kubernetes cluster. As we all know, microservices & containers are the future people.
$ az aks install-cli
Install Docker
Next up, Docker. Since I am using Ubuntu 18.04 it is super simple to install now.
$ sudo apt-get install docker.io
That’s it! Then we just need to configure it to auto start and give it a quick startup now also.
$ sudo systemctl start docker
$ sudo systemcrl enable docker
Last thing is to add our current user to the docker group so that we can run docker commands without sudo.
$ sudo usermod -aG docker $USER
Install Git
Absolutely need this installed! With Microsoft’s commitment to OSS and with most of our tools in GitHub, this is a must have tool.
our recent purchase of GitHub makes this even more so!
$ sudo apt-get install git
Install Visual Studio Code
Finally, a decent IDE - I always loved Visual Studio but it was too bloated - I never thought I would be using one based off Javascript though. Time to install it!
$ curl -O https://go.microsoft.com/fwlink/?LinkID=760868
This will download the latest version of the .deb file from Microsoft
$ sudo dpkg -i <file>.deb
Make sure you replace <file> with the file downloaded in the previous step
$ sudo apt-get install -f
This will fix any broken dependencies from dpkg
Now we get to the fun stuff. Minikube for testing Kubernetes deployments locally and Golang for creating applications to demo in containers and Kubernetes.
Before we can install Minikube we need somewhere for it to run, I have chosen to use Oracle Virtualbox as it’s easy to use and simple to install. Lets go install that first.
I will create a separate blog post on configuring Visual Studio Code as there’s a lot do there.
Install Virtualbox
Virtualbox is super easy to install.
$ sudo apt-get install virtualbox
You might also want to install the Extension Pack but it’s not required for Minikube
$ sudo apt install virtualbox-ext-pack
When I ran Virtualbox for the first time it asked me to upgrade the extension pack, but it will do that through the UI and guide you through it.
Install Minikube
First off we need to download Minikube.
$ curl -O https://github.com/kubernetes/minikube/releases/download/v0.27.0/minikube-linux-amd64
Then we need to move it into the path and give it permission to run as an executable
$ sudo mv ./minikube-linux-amd64 /usr/local/bin/minikube
$ sudo chmod +x /usr/local/bin/minikube
Now we can start Minikube. This will create a new VM inside of Virtualbox where our Kubernetes single node “cluster” will run.
$ minikube start
This might take a few minutes as it has to download the image off the internet. Once this is up and running I recommend you stop minikube with:
$ minikube stop
Then, open up Virtualbox and find the minikube VM. Change it’s video memory from 8GB to 16GB so that you get rid of the alert that Virtualbox will continue to generate.
